| 일 | 월 | 화 | 수 | 목 | 금 | 토 |
|---|---|---|---|---|---|---|
| 1 | 2 | 3 | 4 | 5 | 6 | 7 |
| 8 | 9 | 10 | 11 | 12 | 13 | 14 |
| 15 | 16 | 17 | 18 | 19 | 20 | 21 |
| 22 | 23 | 24 | 25 | 26 | 27 | 28 |
- 빅데이터
- 딥러닝
- 기본기
- 웹크롤링
- 파이썬게임만들기
- 파이썬독학
- 자동화
- 인공지능
- Python
- OpenAPI
- 오늘배워오늘쓰는
- STT
- 소스코드
- 음성인식
- 독학
- 간단한파이썬게임
- 카카오
- 구글일정
- 파이썬간단한게임
- Ai
- 파이썬게임
- 파이썬
- 구글
- 구글캘린더
- 크롤링
- Selenium
- kakao
- 머신러닝
- Quickstart
- 업무자동화
- Today
- Total
ai-creator
Python으로 네이버 블로그 자동 포스팅 하기 본문

<< 목표 >>
프로그램을 통해서(=자동으로) 나의 블로그에 글을 쓰려고 합니다.
네이버에서는 1일 200건까지 블로그 API 사용 가능합니다.

<< 사전 준비 >>
- 네이버 OpenAPI 사용하기 (준비사항 : 사용자인증)
<< 구현 순서 >>
| Step 1 | 애플리케이션에 블로그API 추가하기 |
| Step 2 |
구현 (Quick Start) - 인증을 위한 '동의하기' 요청 - code값과 state값 추출 - access_token 요청 - 글쓰기1) 텍스트 - 글쓰기2) 텍스트 + 이미지 |
| Step 3 | 블로그 확인 |
Step1) 애플리케이션에 "블로그" API 추가하기
접속 URL : https://developers.naver.com/apps/#/list

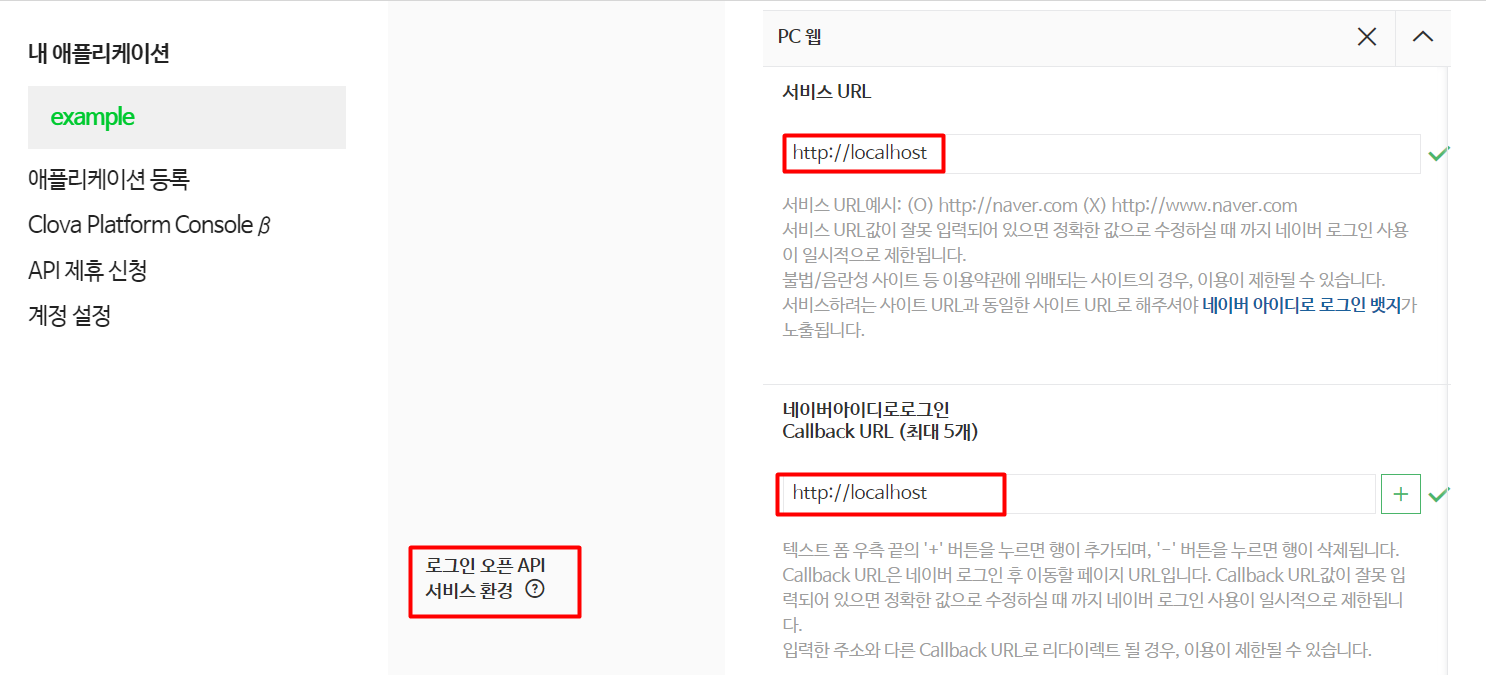
블로그의 경우 로그인이 필요하므로 서비스 url, callback url을 등록해야 한다.

하단의 "수정" 버튼을 현재 상태를 저장한다.
Step2) 구현 (Quick Start)
ㅁ 인증을 위한 "동의하기" 요청
import urllib
import requests

# 엑세스 코드(code)를 가져오기 위함
ncreds = {
    "client_id"     : "<이곳에 cliend_id 값을 넣어주세요>",
    "client_secret" : "<이곳에 client_secret 값을 넣어주세요>",
    "access_token"  : "",
    "refresh_token" : "",
}

login_url = "https://nid.naver.com/oauth2.0/authorize?"
login_parmas = (
                "response_type=code"
                "&redirect_uri=http://localhost"
                "&state=REWERWERTATE&client_id="
                ) + ncreds.get('client_id')

# 출력되는 url에 접속해서
# "블로그 쓰기" 권한 제공에 동의하고
# 상단 URL에 적혀있는 code와 state 값을 가져오세요.
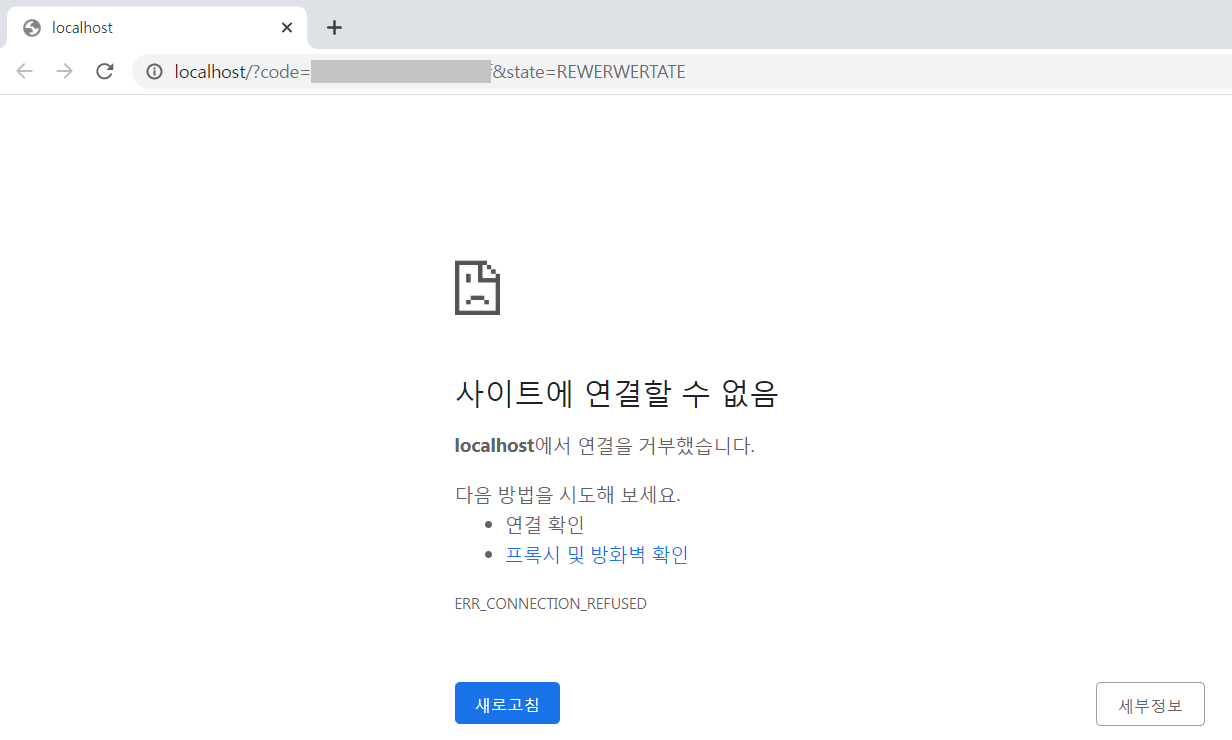
# 사이트에 연결할 수 없다고 나오면서 상단 URL에는 code와 state 값이 담겨 있습니다.
print(login_url + login_parmas)
print로 출력되는 주소값을 복사해서 웹브라우저 주소창에 복사합니다.

다음과 같이 팝업이 뜨면, [동의하기] 버튼을 누릅니다.

화면이 변경되는데요, 마치 에러가 난것 처럼 보여도 정상입니다.
주소창의 url은 변경되어 있습니다. 이 값을 복사해서 코드에 넣어줍니다.

ㅁ code값과 state 값 추출
result_url = "< 여기에 복사한 URL을 붙여넣으세요. >"

result_params = result_url.split("?")[1]
print(result_params)
code = result_params.split("&")[0].split("=")[1]
state = result_params.split("&")[1].split("=")[1]

print("code : ", code)
print("state : ", state)
ㅁ access_token 요청
추출된 code, state값을 이용해서 access_token을 요청합니다.
access_url = "https://nid.naver.com/oauth2.0/token?"
access_data = (
    "grant_type=authorization_code"
    "&code=%s"
    "&client_id=%s"
    "&client_secret=%s"
    "&state=%s"
) %(code, ncreds.get('client_id'), ncreds.get('client_secret'), state)

print(access_data)

res = requests.get(access_url + access_data)
res.json()

## 정보 backup
ncreds['refresh_token'] = res.json()['refresh_token']
ncreds['access_token'] = res.json()['access_token']
ㅁ 글쓰기1) 텍스트
네이버에서 제공하는 예제 샘플코드를 그대로 가져와 token값만 변경합니다.
import os
import sys
import urllib.request

token = ncreds.get('access_token')
header = "Bearer " + token # Bearer 다음에 공백 추가
url = "https://openapi.naver.com/blog/writePost.json"
title = urllib.parse.quote("네이버 블로그 api Test Python")
contents = urllib.parse.quote("네이버 블로그 api로 글을 블로그에 올려봅니다.")
data = "title=" + title + "&contents=" + contents
request = urllib.request.Request(url, data=data.encode("utf-8"))
request.add_header("Authorization", header)
response = urllib.request.urlopen(request)
rescode = response.getcode()
if(rescode==200):
    response_body = response.read()
    print(response_body.decode('utf-8'))
else:
    print("Error Code:" + rescode)
ㅁ 글쓰기2) 텍스트 + 이미지
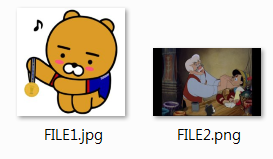
이미지도 2장 올려보자. 이미지 파일명은 한글은 안되니, 참고하자.
네이버에서 제공하는 예제 샘플코드를 그대로 가져와 token값 / 이미지 파일명만 변경합니다.

이렇게 2장의 이미지를 준비하고, 파일명이 변경되었으니 소스코드에서도 변경하였다.
#  Blog mulipart upload - python
import os
import sys
import requests

token = ncreds.get('access_token')
header = "Bearer " + token # Bearer 다음에 공백 추가
url = "https://openapi.naver.com/blog/writePost.json"

title = "네이버 블로그 api Test Python"
contents = ("<font color='red'>python multi-part</font>로 첨부한 글입니다. "
            "<br> python 이미지 2개 첨부 <br> "
            "<img src='#0' /> "
            "<img src='#1' />")
data = {'title': title, 'contents': contents}
files = [
    ('image', ('FILE1.jpg', open('./FILE1.jpg', 'rb'), 'image/jpeg', {'Expires': '0'})),
    ('image', ('FILE2.png', open('./FILE2.png', 'rb'), 'image/jpeg', {'Expires': '0'}))
    ]

headers = {'Authorization': header}
response = requests.post(url, headers=headers, files=files, data=data)

rescode = response.status_code
if(rescode==200):
    print (response.text)
else:
    print("Error Code:" + str(rescode))
(참고) API가이드에 image관련 설명

Step3) 블로그 확인
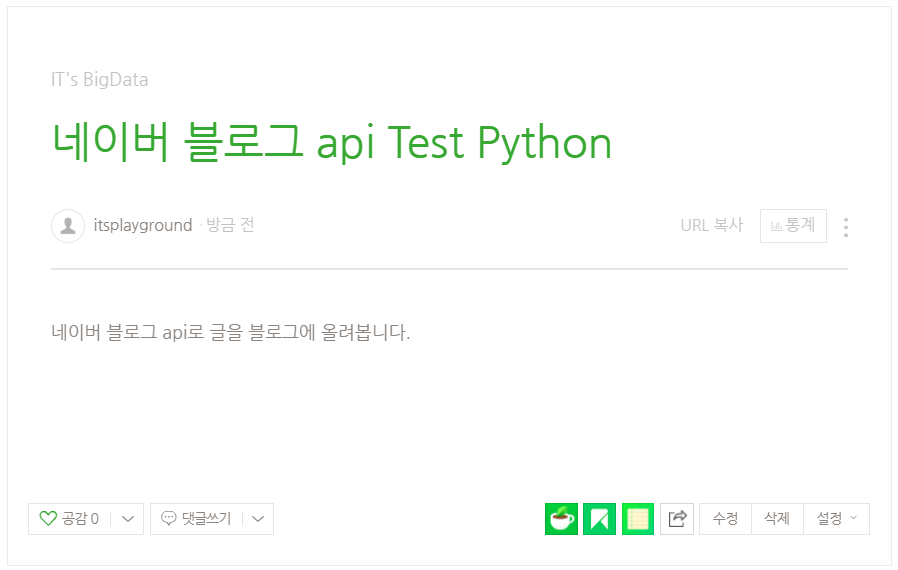
블로그에 들어가 어떤 글이 업로드가 되었는지 확인해보세요.
글쓰기1) 텍스트

글쓰기2) 텍스트 + 이미지

네이버에서 제공하는 메뉴얼을 보고, 더 재밌는 방법으로 포스팅해보세요^^
덧붙임1) refresh_token으로 access_token 재발급 받기
참고 URL : refresh_token 설명

즉, access_token의 경우 딱 1시간만 유효하다. access_token을 다시 받는 절차는 까다롭고 귀찮으니 refresh_token을 사용해서 access_token을 갱신해서 사용하는 방법이다.
access_url = "https://nid.naver.com/oauth2.0/token?"
access_data = (
    "grant_type=refresh_token"
    "&client_id=%s"
    "&client_secret=%s"
    "&refresh_token=%s"
) %(ncreds.get('client_id'), ncreds.get('client_secret'), ncreds.get('refresh_token'))

print(access_data)

res = requests.get(access_url + access_data)
print(res.json())

## 정보 update
ncreds['access_token'] = res.json()['access_token']
덧붙임 2) key 저장하고, 불러오기
key를 얻기위해 어려운 과정을 거쳤으니, 또 다시 이런과정을 겪지 않기 위해서는 파일로 저장해 두면 좋겠습니다.
import json
## 저장
with open('naver_blog_auth_key.json', 'w', encoding='utf-8') as fp:
    json.dump(ncreds, fp, indent="\t")
저장하였다면, 파일에서 이젠 파일에서 읽어오시죠!
with open('naver_blog_auth_key.json', 'r') as fp:
    ncreds = json.load(fp)
<< 참고 >>
https://developers.naver.com/docs/blog/post/
저작물의 저작권은 작성자에게 있습니다.
공유는 자유롭게 하시되 댓글 남겨주세요~
상업적 용도로는 무단 사용을 금지합니다.
끝까지 읽어주셔서 감사합니다^^
'오늘 배워 오늘 쓰는 OpenAPI > Quick Start' 카테고리의 다른 글
| [Python/Windows] Selenium 크롤러 - 네이버 자동 로그인 (캡차 해결 버전) (15) | 2020.03.10 |
|---|---|
| [Python] 아파트 매매 실거래가 수집하기 (feat. 국토교통부 OpenAPI) (14) | 2020.03.09 |
| 음성인식 (STT) 빨리 시작하기 - 카카오 OpenAPI (6) | 2020.03.06 |
| 음성인식(STT/TTS) 빨리 시작하기 - SpeechRecognition 구글 (2) | 2020.03.06 |
| 음성인식(STT) 빨리 시작하기 - ETRI OpenAPI (2) | 2020.03.06 |


